Anyone who has ever hung a picture in a tiled room, mounted a bathroom shelf or fixed a shower rail will be familiar with the problem: sometimes a hole is left in the tile.
These holes are not only unattractive to look at, they can also affect the structure and longevity of the tiles. So the question arises: how can these drill holes be effectively sealed to preserve the aesthetics and structure?
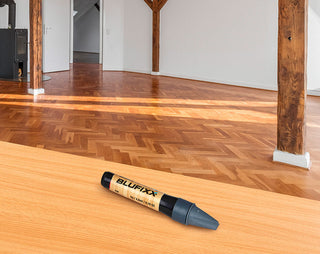
At BLUFIXX, we have developed a solution that is both effective and easy to use: the BLUFIXX SMART REPAIR tile repair pin. This innovative product can be used to close drill holes in tiles quickly and cost-effectively.
This blog post provides detailed instructions on how to seal drill holes and highlights the benefits and many possible applications of the BLUFIXX SMART REPAIR repair pen.
THE SEALING OF DRILL HOLES IN TILES
Sealing drill holes in tiles is more than just an aesthetic necessity.
Especially in areas that are regularly exposed to moisture, such as bathrooms and kitchens, water can penetrate the wall through open drill holes and lead to problems such as mold growth and structural damage.
But even apart from the moisture issue, closing drill holes is important to protect the tiles and extend their lifespan.
TOOLS AND MATERIALS FOR REPAIRING DRILL HOLES IN TILES
Preparing for a repair means making sure you have all the necessary tools and materials to hand.
First of all, you need the BLUFIXX SMART REPAIR repair pen. This pen is specially designed to make repairs such as sealing drill holes in tiles easy, quick and efficient.
It contains a special repair gel that hardens when exposed to an LED lamp.
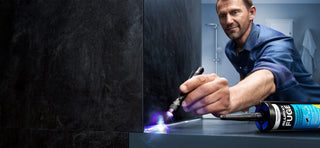
You also need the BLUFIXX LED lamp. This is used to cure the repair gel. The lamp generates blue light, which enables the gel to cure in just a few seconds.
THIS IS HOW EASY IT IS TO SEAL A DRILL HOLE IN A TILE WITH BLUFIXX SMART REPAIR: STEP-BY-STEP INSTRUCTIONS
- Pre-treat the tile: Make sure the tile you are working on is clean and dry. Remove any dust or dirt from the drill hole.
- Application of the repair gel: Take the BLUFIXX SMART REPAIR repair pen and apply the gel in layers into the drill hole. Make sure that each layer is not thicker than 2 mm.
- Curing with LED light: Illuminate the repair gel with the BLUFIXX LED lamp. The gel hardens within 3 to 15 seconds – but only in the areas illuminated by the LED lamp.
- Post-treatment: After curing, you can finish the repaired area as required, e.g. sanding, varnishing or polishing.And just like that, you have successfully sealed a drill hole in a tile. With the BLUFIXX Solution, you not only save time and money, but you can also admire the result of your work.
EXPERT TIP:
Make sure that the repair gel is fully cured before you start working on it. It should be hard and firm, not sticky or flexible.
THE ADVANTAGES OF BLUFIXX SMART REPAIR
BLUFIXX SMART REPAIR offers a number of advantages that make it the ideal solution for repairing drill holes in tiles. It has been specially developed to be simple and effective for both DIY enthusiasts and professionals.
- Simplicity: Easy to use, even for DIY enthusiasts.
- Speed: Drill holes in tiles can be repaired within minutes.
- Cost-effectiveness: A cost-effective alternative to replacing tiles.
- Efficiency: Provides a durable repair solution that extends the life of your tiles.