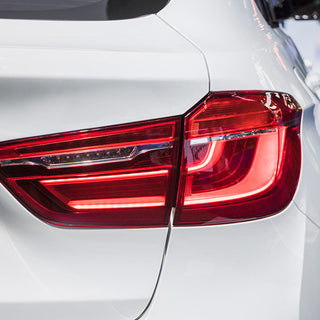
Headlights are essential for visibility and your safety in the dark. Find out here how you can repair cracked headlights and which methods are best suited.
First signs of headlight defects
A defective headlight is often noticeable by less light or a flickering light. This can severely impair visibility in the dark and increase the risk of accidents. Another sign can be moisture or condensation inside the headlamp, which indicates leaks.
Legally speaking, defective headlights can lead to fines and a failure to pass the TÜV inspection. Defective headlights are therefore not only a safety risk, but can also lead to legal problems. In the worst case, a defective headlight can be considered a contributory cause in an accident. This in turn can lead to higher penalties and insurance claims.
Immediate replacement or repair is therefore necessary to restore full function and safety. The headlights should also be checked for possible damage during regular maintenance so that measures can be taken at an early stage.
Causes of cracks in headlights
Mechanical impacts such as stone chips and accidents are common causes of cracks in headlights. Stone chips often occur on highways or country roads when small stones are thrown up by vehicles in front. Accidents and collisions, even at low speeds, can also cause major damage to headlights.
Material fatigue and production errors are further causes that can lead to cracks. Over time, plastic becomes brittle and susceptible to cracking. Especially if it is constantly exposed to extreme weather conditions such as UV radiation and large temperature fluctuations. Inferior materials or manufacturing processes can also reduce the service life of the headlights.
DIY repairs vs. workshop solutions
You can carry out some repairs yourself, such as replacing conventional light bulbs or small sealing jobs with silicone. This work usually only requires basic manual skills and the right tools. However, for major damage such as cracks or scratches on headlights and problems with xenon or LED headlights, you should visit a workshop.
This damage requires specialist knowledge and tools that are available in a workshop. Modern xenon and LED headlights in particular require precise adjustment, which can only be carried out using special measuring equipment. An improper repair can further deteriorate the light output and lead to legal problems.
Methods for repairing headlight cracks
Before you start the repair, you should thoroughly clean and dry the headlights. To do this, dip a soft cloth in a mild soap solution and wipe the surface of the headlight. DIY methods include the use of adhesives and fillers as well as polishing the surface.
Professional repairs usually involve replacing the plastic cover or the entire headlight. In the case of deep cracks or major damage, replacement is often the only sustainable solution. It is important that the repaired or replaced parts meet the legal requirements so as not to jeopardize road safety.
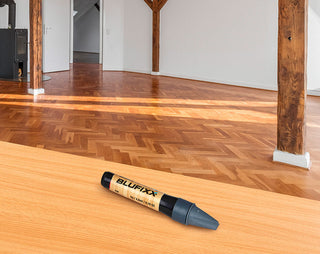
BLUFIXX as a solution
The BLUFIXX-Pro headlight set offers an innovative solution for repairing headlight cracks. The light-curing repair gel can be easily applied and cured with an LED light. This enables a quick and durable repair that saves both time and money.
Using the BLUFIXX-Pro Set Headlight is particularly advantageous as the repair gel remains liquid until cured and can be sculpted as desired. This ensures a perfect fit to the damaged area and prevents unwanted contamination of the surrounding area. In addition, the gel is water-resistant and temperature-resistant, which ensures a long-lasting repair.
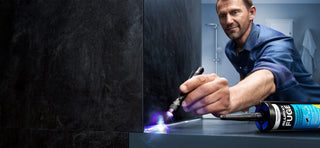
Step-by-step instructions: Headlight crack repair with BLUFIXX
Prepare the surface by cleaning and drying the headlight. To do this, use a lint-free cloth and, if necessary, a hairdryer to ensure that no moisture remains.
Apply the repair gel in layers, whereby each layer should not be thicker than 2 mm. Work slowly and precisely to ensure even distribution of the gel.
Cure the gel with the LED light, which takes about 3 to 15 seconds per layer. Make sure that the entire surface is evenly illuminated. If necessary, you can sand and polish the cured surface to achieve a smooth and shiny finish.